本ページにはプロモーションが含まれています。
【HTML・Googleカレンダー】Webサイトにカレンダーを実装する方法を解説

時々、Webサイトのサイドバー等にカレンダーを設置しているWebサイトを見かけます。
今回はこのようなカレンダーをHTMLやGoogleカレンダーを使って実装する方法を解説します。
目次
HTMLカレンダーの作り方
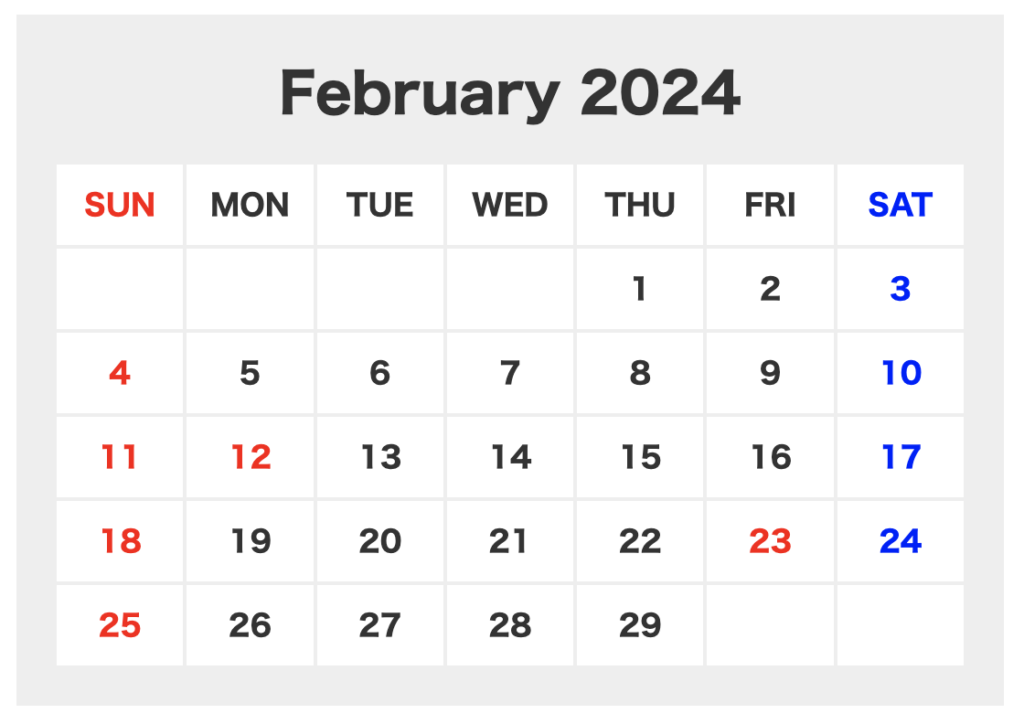
それではカレンダーをHTMLで作る方法を解説します。今回は以下のようなカレンダーを作ることにします。
カレンダーの作成にはtableタグを使用するので、詳しい使い方について知らない方は以下の記事をご覧ください。
あわせて読みたい


【HTML】tableタグの使い方、テーブル・表を作る方法を解説
今回は、HTMLのtableタグの使い方について解説していきます。 tableタグは料金表やカレンダーなど、さまざまなところで使用されています。まだ使い方が分からないという…
HTML
HTMLコードは以下の通りです。
<div class="calendar-wrap">
  <div class="calendar-title">February 2024</div>
  <table class="calendar">
    <thead>
      <tr>
        <th scope="col" class="sun">SUN</th>
        <th scope="col">MON</th>
        <th scope="col">TUE</th>
        <th scope="col">WED</th>
        <th scope="col">THU</th>
        <th scope="col">FRI</th>
        <th scope="col" class="sat">SAT</th>
      </tr>
    </thead>
    <tbody>
      <tr>
        <td class="sun"></td>
        <td></td>
        <td></td>
        <td></td>
        <td>1</td>
        <td>2</td>
        <td class="sat">3</td>
      </tr>
      <tr>
        <td class="sun">4</td>
        <td>5</td>
        <td>6</td>
        <td>7</td>
        <td>8</td>
        <td>9</td>
        <td class="sat">10</td>
      </tr>
      <tr>
        <td class="sun">11</td>
        <td class="yasumi">12</td>
        <td>13</td>
        <td>14</td>
        <td>15</td>
        <td>16</td>
        <td class="sat">17</td>
      </tr>
      <tr>
        <td class="sun">18</td>
        <td>19</td>
        <td>20</td>
        <td>21</td>
        <td>22</td>
        <td class="yasumi">23</td>
        <td class="sat">24</td>
      </tr>
      <tr>
        <td class="sun">25</td>
        <td>26</td>
        <td>27</td>
        <td>28</td>
        <td>29</td>
        <td></td>
        <td class="sat"></td>
      </tr>
    </tbody>
  </table>
</div>HTMLコードのポイントは、色を変えたい部分( 土曜日、日曜日、祝日)にだけクラス名を付けてあげるということです。
こうしておくと、CSSで土曜日、日曜日、祝日だけ色を変更できるようになります。
また、テーブルの1行目のみthタグを使用して、テーブルの見出しがどこなのかを設定しています。thタグにscope属性を指定しますが、scope="col"とすることで、セルがどの方向に対しての見出しなのかを指定できます。
CSS
CSSコードは以下の通りです。
.calendar-wrap {
  width: 100%;
  max-width: 500px;
  margin: 0 auto;
  background: #eee;
  color: #333;
  padding: 20px;
}

.calendar-title {
  font-size: 30px;
  text-align: center;
  font-weight: bolder;
  margin-bottom: 0.5em;
}

.calendar {
  width: 100%;
  table-layout: fixed;
  border-collapse: collapse;
}

th,
td {
  text-align: center;
  padding: 10px 0;
  background-color: #fff;
  border: 2px solid #eeeeee;
}

td {
  font-weight: bolder;
}

.sun {
  color: red;
}

.sat {
  color: blue;
}

.yasumi {
  color: red;
}CSSコードのポイントは、tableタグにtable-layout: fixedを指定し、セルの横幅を均一にしている点です。
これによって列幅が揃った綺麗なカレンダーが作成できます。
なお、上記例ではカレンダーの横幅を500pxとしていますが、サイドバー内など狭い幅の中に表示する場合でも綺麗に見られるようにするには、カレンダーの横幅やフォントサイズを微調整する必要があります。
Googleカレンダーを埋め込む方法
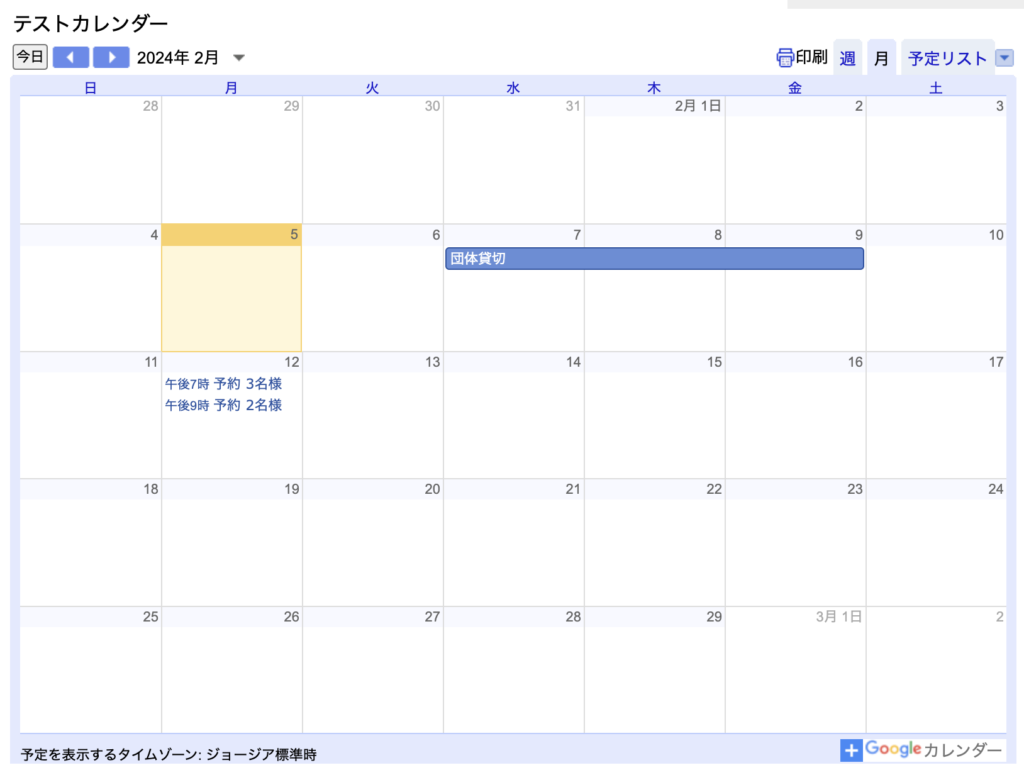
カレンダーの中に、その日の予約状況や開催予定イベントといった情報を表示させたい場合は、Googleカレンダーを埋め込む方法が便利です。
Googleカレンダーの埋め込み方法は以下の通りです。
Googleカレンダーを埋め込む方法
- STEP. 1:新規カレンダーを作成する
- STEP. 2:予約状況、イベント情報などを登録する
- STEP. 3:カレンダーの埋め込みコードを埋め込む
STEP. 1:新規カレンダーを作成する
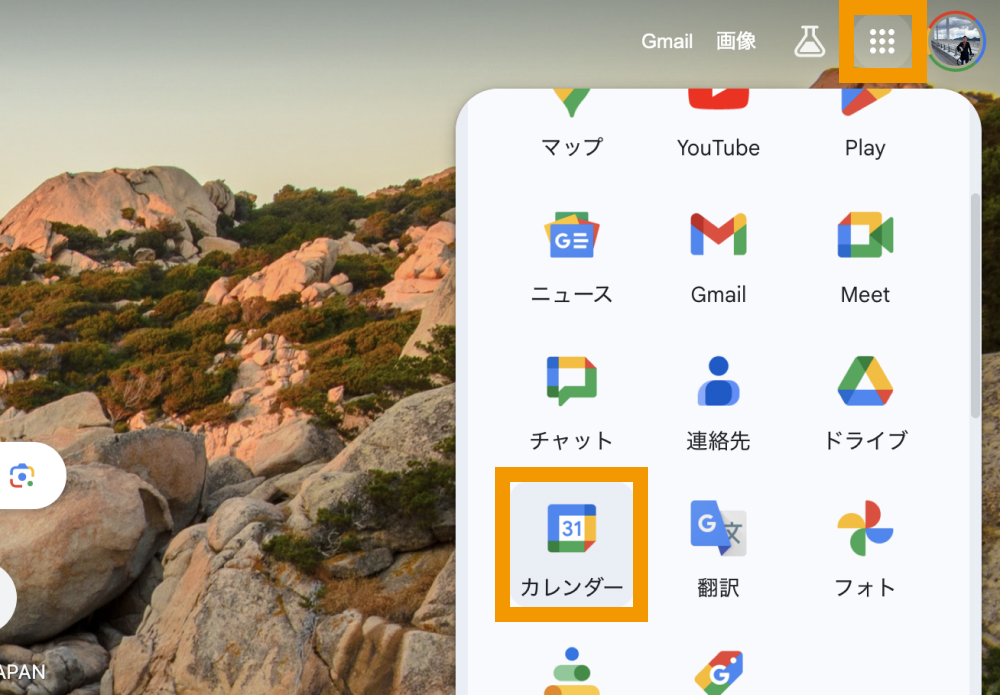
まずは新規カレンダーを作成しましょう。Googleカレンダーをクリックします。
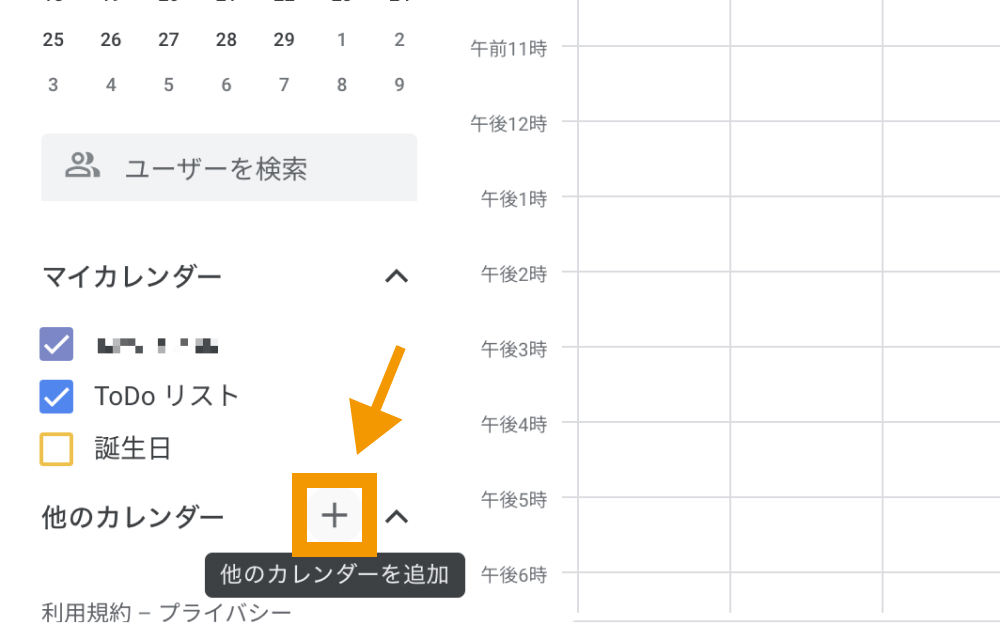
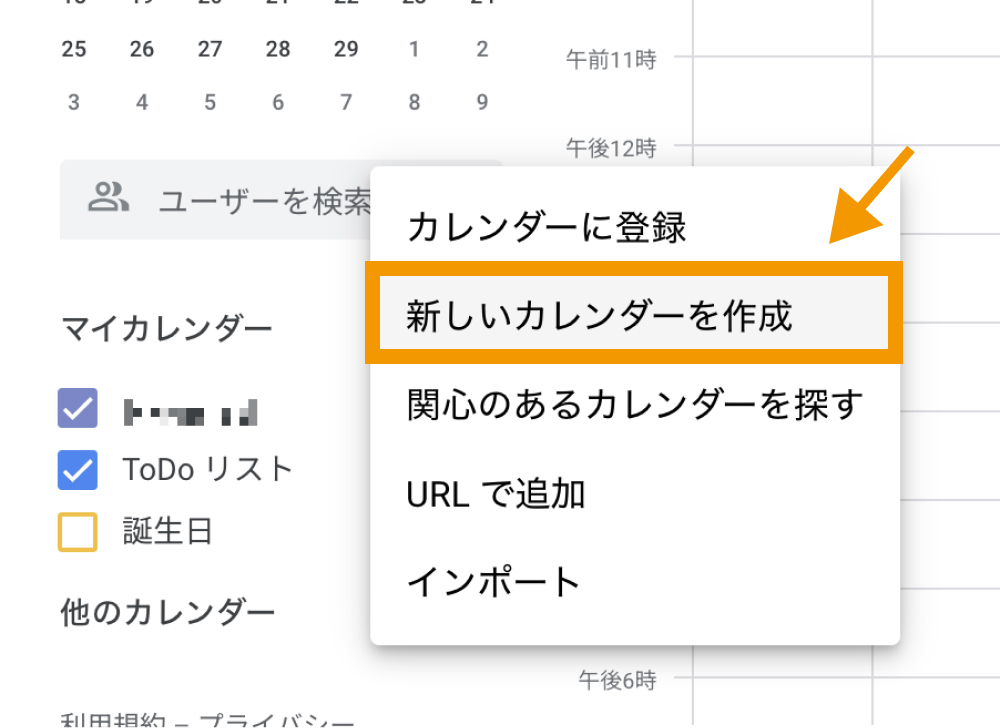
「他のカレンダーを追加」をクリックします。
「新しいカレンダーを作成」をクリックします。
カレンダーのタイトルや説明文、タイムゾーンを指定して「カレンダーを作成」をクリックします。
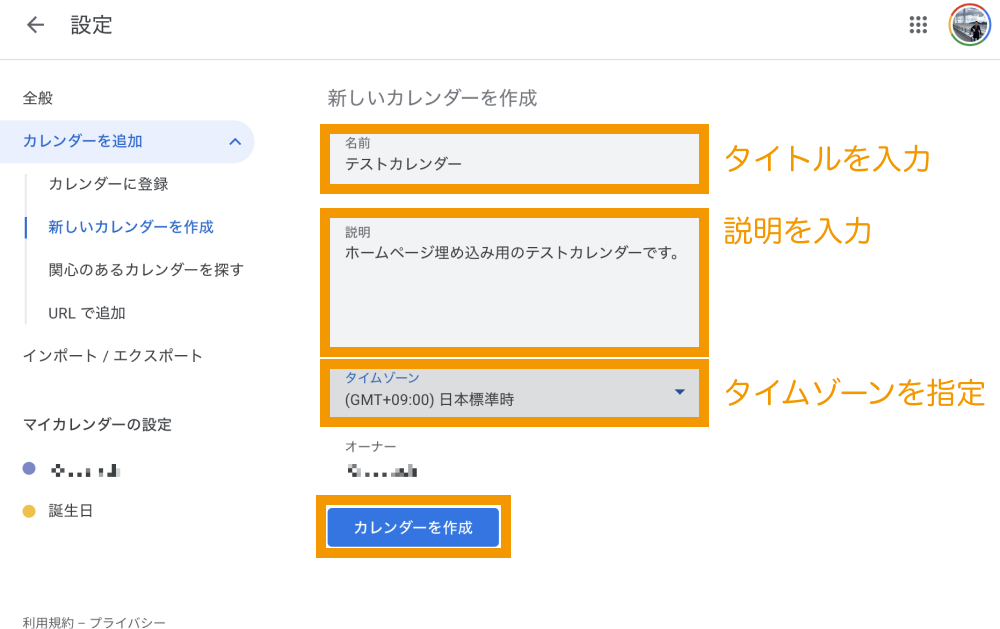
以上で、新しいGoogleカレンダーが追加されました。
STEP. 2:予約状況、イベント情報などを登録する
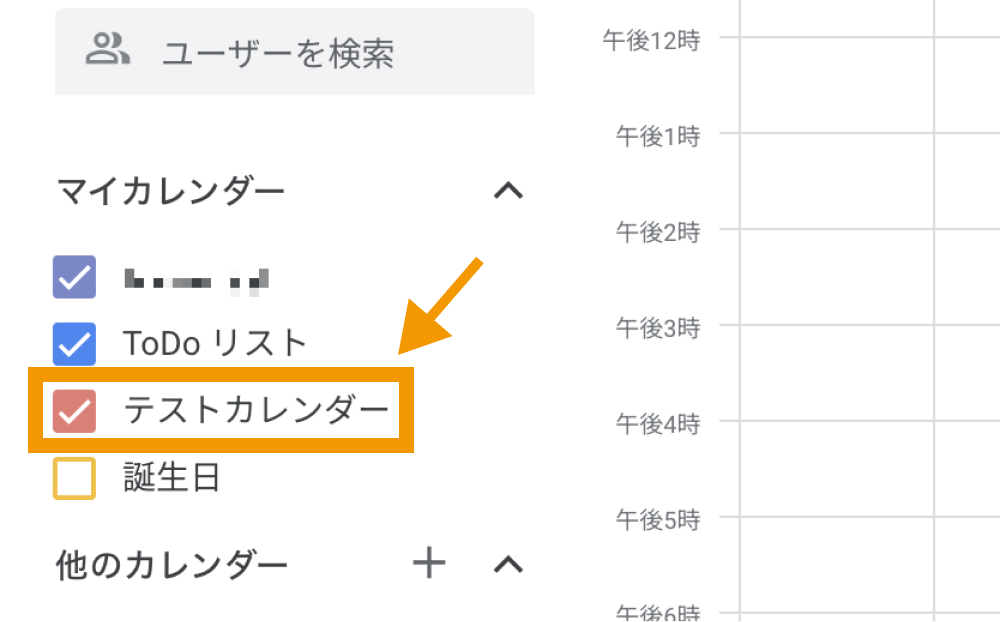
次に、新しく追加されたカレンダーに予約状況やイベント情報など、ユーザーに見せたい情報を追加しましょう。
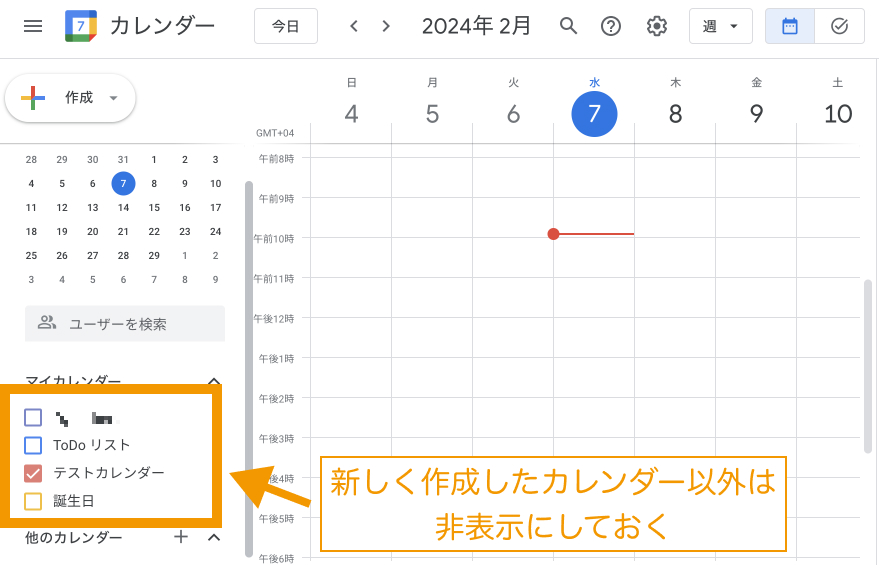
まずは、新しく追加したカレンダー以外の予定は非表示にしておきます。
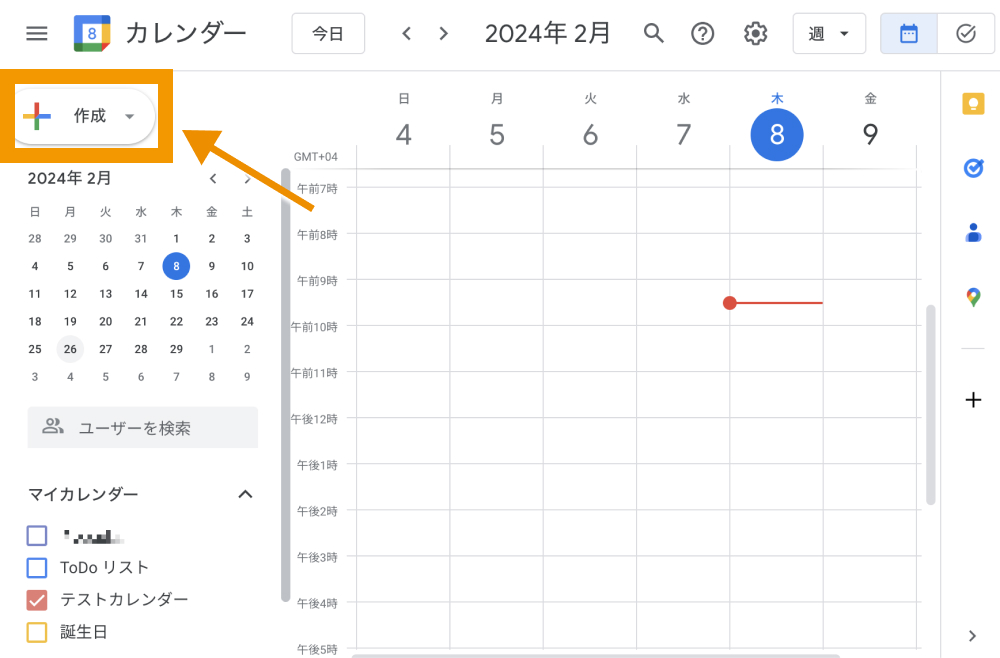
Googleカレンダーに新しい予定を追加する場合は、画面左上の「作成」をクリックします。
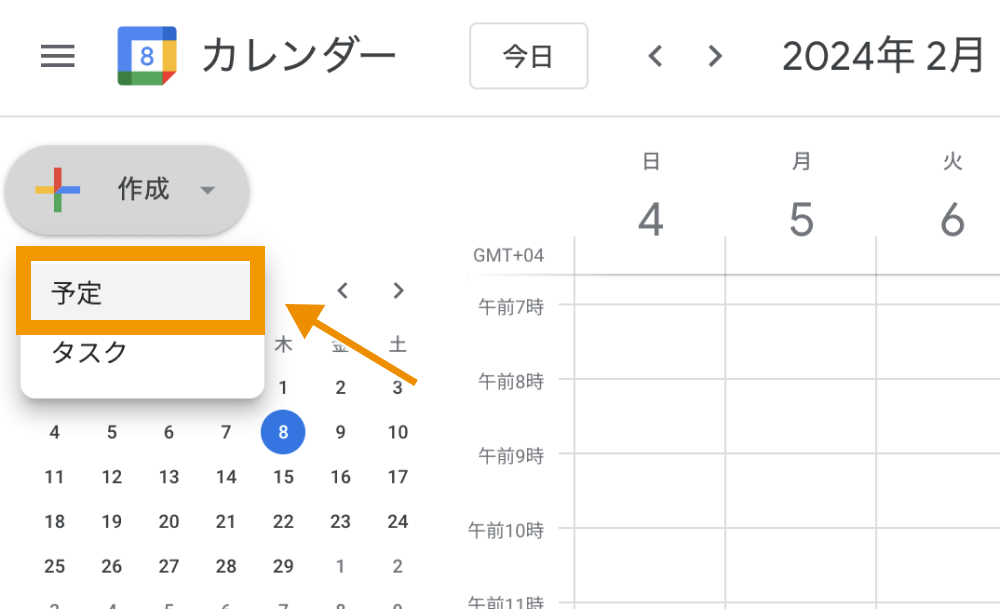
「予定」をクリックします。
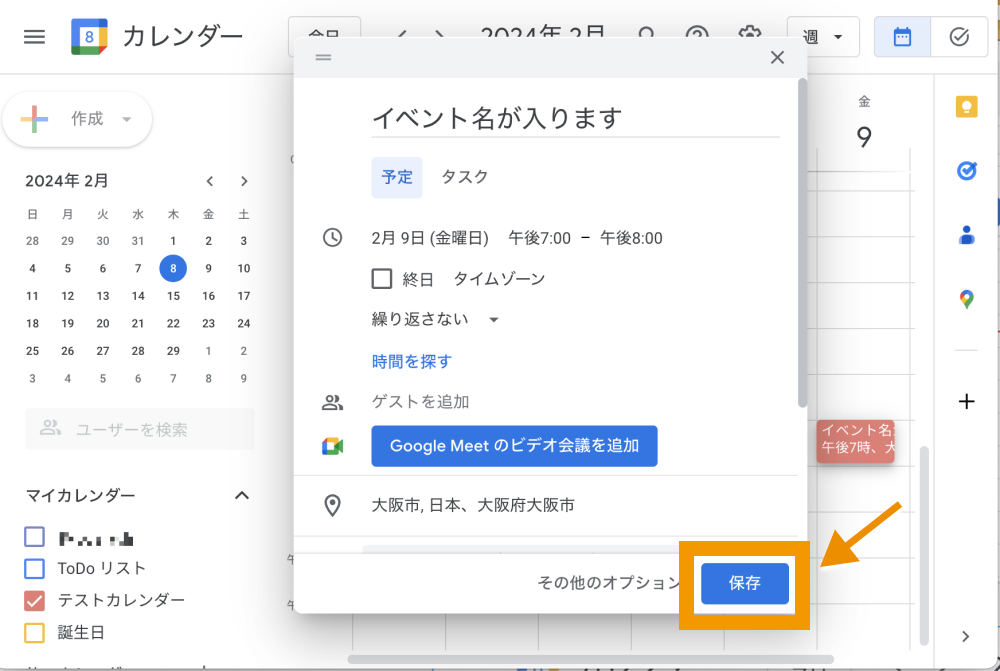
タイトルや時間、場所や説明文を記載して「保存」をクリックします。
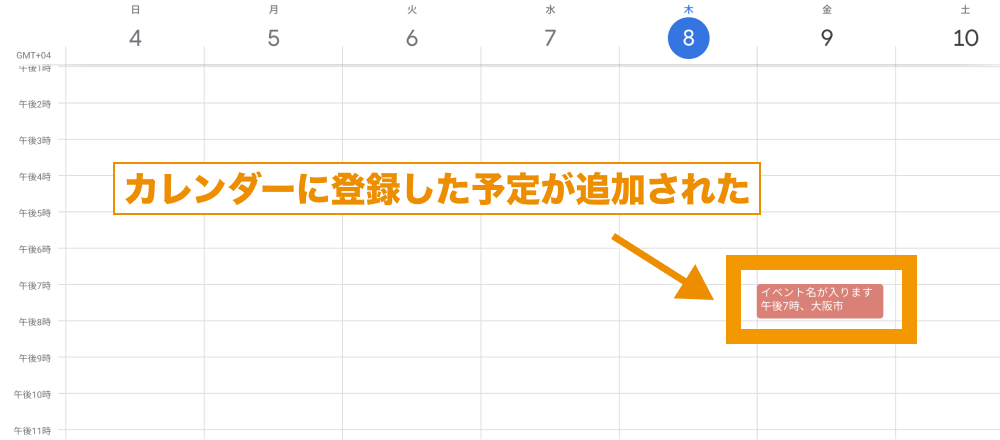
以上で、Googleカレンダーに予定を追加できました。
STEP. 3:カレンダーの埋め込みコードを埋め込む
予定が追加できたら、カレンダーの埋め込みコードを取得しましょう。
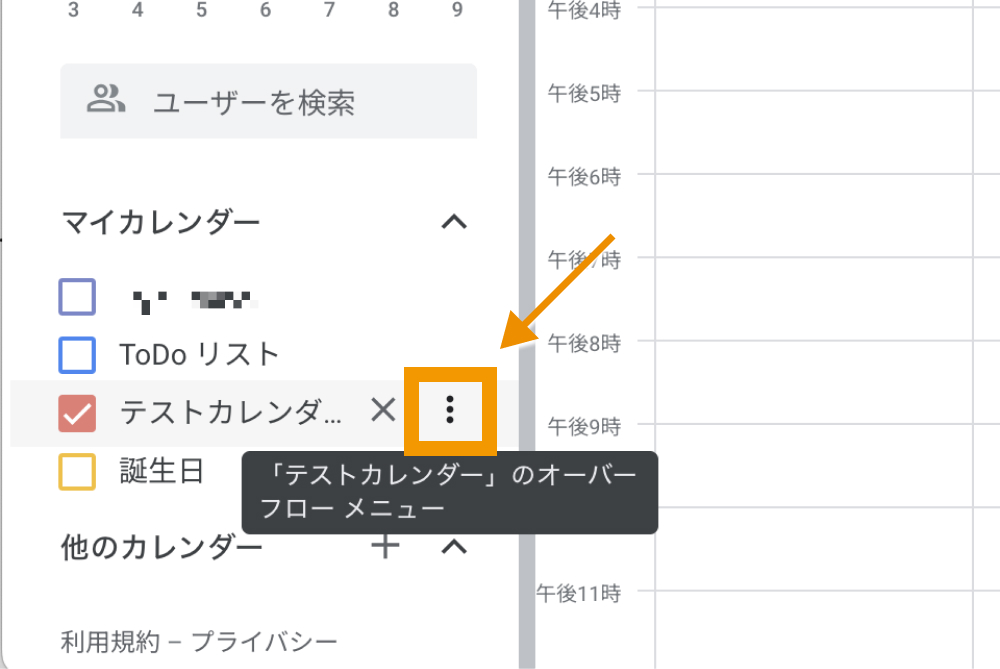
カレンダー名の右側に表示されている縦三点メニュー(︙)をクリックします。
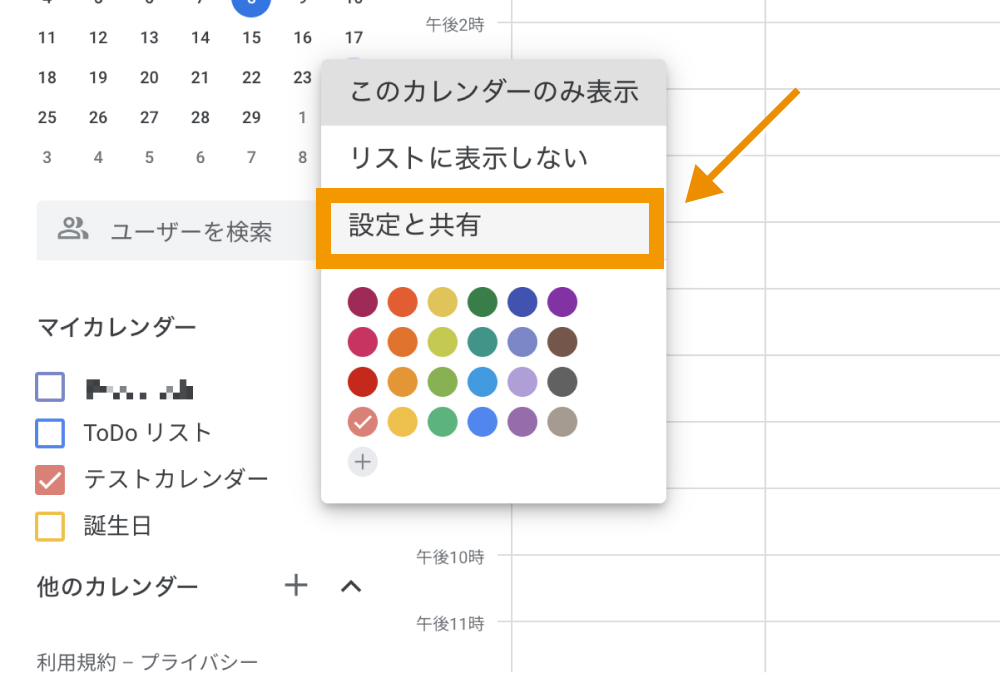
「設定と共有」をクリックします。
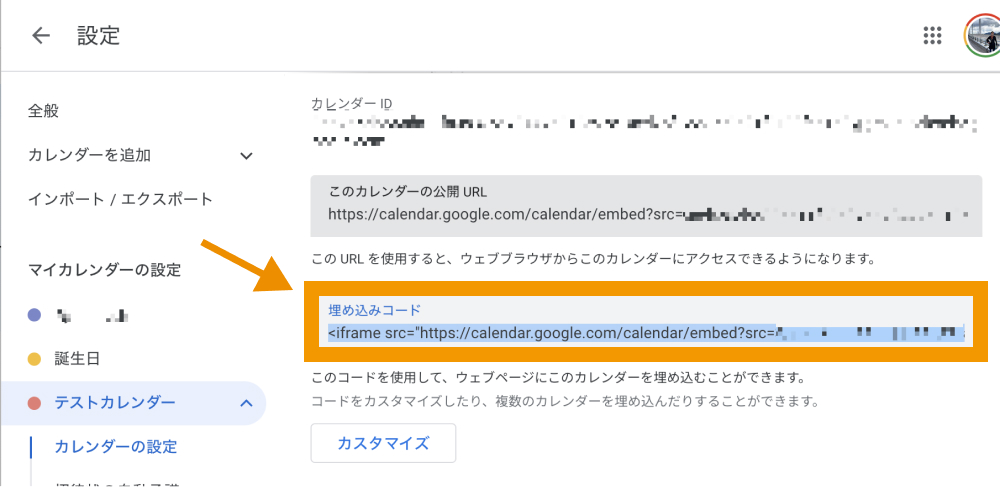
画面を下の方にスクロールすると「埋め込みコード」があるので、こちらをコピーします。
あとは表示させたい場所でコードをペーストすればGoogleカレンダーが埋め込まれます。
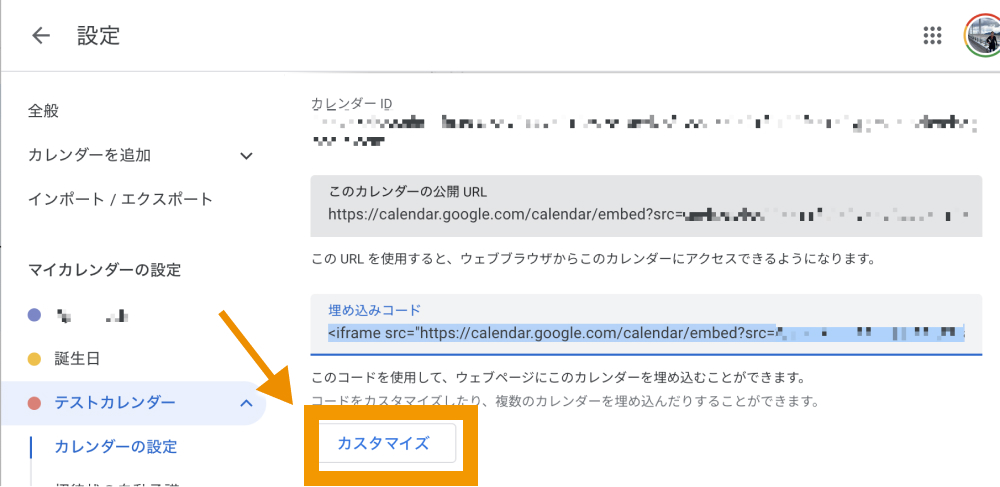
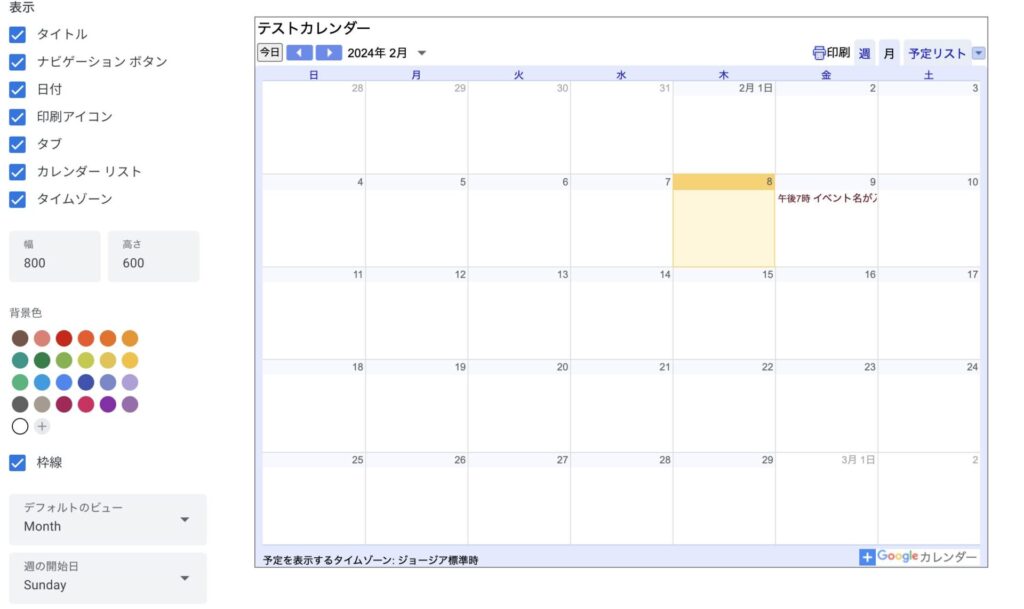
なお、Googleカレンダーの横幅や高さ、背景色等の変更を行いたい場合は埋め込みコード下の「カスタマイズ」から行えます。
補足:Googleカレンダーをレスポンシブ対応にする
親要素の横幅に合わせて縦横比率を保ったまま埋め込んだカレンダーが拡大・縮小されるようにしたい場合は、埋め込みコードを<div class="responsive-calendar"></div>で囲いCSSを追記します。
<div class="responsive-calendar">
  <!-- Googleカレンダー埋め込みコード -->
</div>
.responsive-calendar iframe {
width: 100%;
height: 100%;
aspect-ratio: 4/3;
}aspect-ratio: 4/3としているので、縦横比率は4対3となっていますが3対2としたい場合は3/2と変更してください。
まとめ
今回はHTMLやGoogleカレンダーを使ってWebサイトにカレンダーを実装する方法を解説しました。
カレンダーを自身のサイトに埋め込みたいと考えている方はぜひ試してみて下さい。
今回は以上になります。最後までご覧頂き、ありがとうございました。